💻 3D Laptop CSS Quiz
Test our understanding of the CSS behind the laptop.
🎉 Quiz Complete!


Test our understanding of the CSS behind the laptop.

5th December.
(a+b)2
Nitric Acid, HNO3
Carbon dioxide, CO2

Video Tutoral at https://youtu.be/bo4HN8R_lPY
1. Code Before Using rowspan & colspan: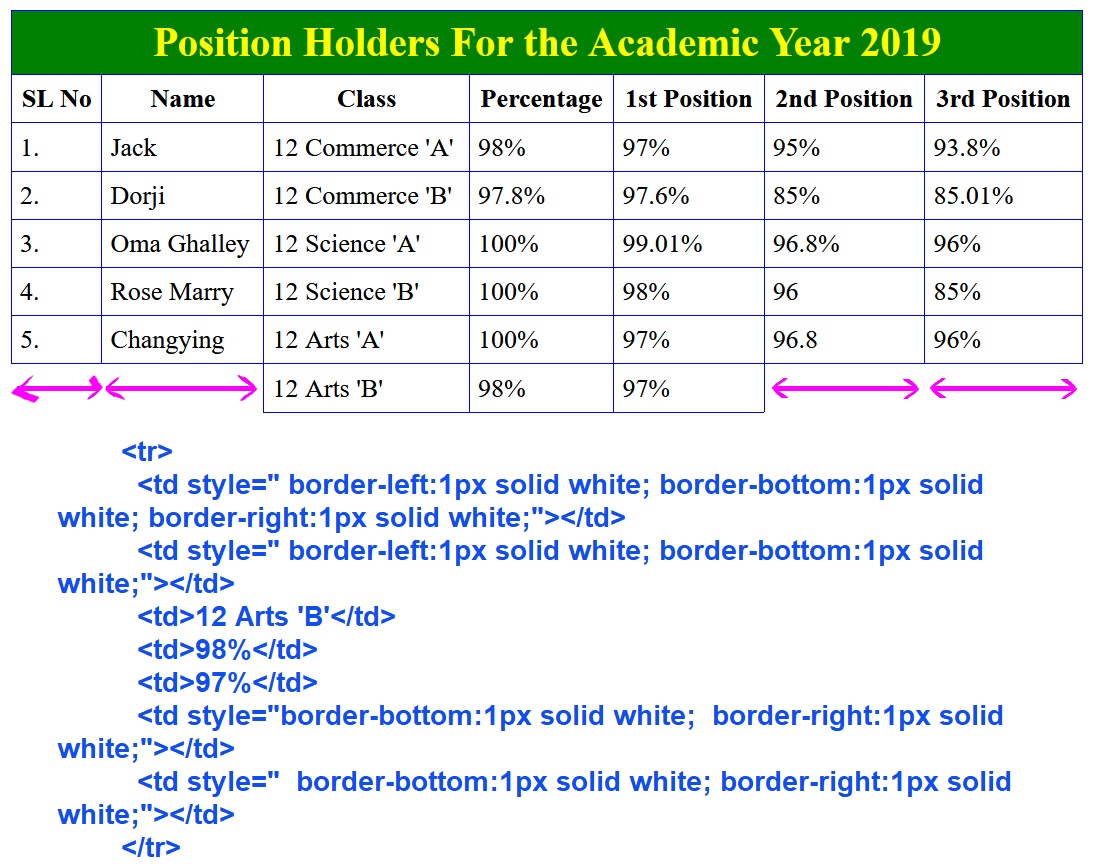 Full code:↓
Tables are crucial elements of any website as they are used to present and organize data in a structured manner. However, large tables with numerous rows and columns can often cause the web page to exceed its intended size and make it difficult for users to view the data. This is where a scrollbar becomes indispensable, enabling users to navigate through the table with ease and without having to resize their browser window.

Try it at https://codepen.io/sirchogyal/pen/QWZaKpY
The first step in creating a table with a scrollbar is to create an HTML table. For our example, we will be using a table with five columns and five rows. Below is the HTML code for the table with a horizontal scrollbar using HTML and CSS and if you reduce the height, the vertical scrollbar from the right side will also appear. The table contains five columns: "SL No", "Particulars", "Quantity", "Unit Price", and "Total Amount (USD)". Each row of the table displays data related to an office furniture item, including the item number, description, quantity, unit price, and total amount in US dollars.
HTML CodeAfter creating the HTML table, we need to apply some CSS styles to add a scrollbar. The following is the CSS code for the scroll-bar class:
StylesheetThe scroll-bar class contains CSS styles for the scrollbar. The height and width properties define the dimensions of the scrollbar container. The border property sets the border of the scrollbar container, while the font-family property sets the font family of the text inside the scrollbar container. The overflow property determines whether to clip the content or to add a scrollbar.
To add a horizontal scrollbar to the table, we can use the white-space property to prevent the text from wrapping and overflow-x property to add a horizontal scrollbar.
To add a vertical scrollbar, we can use the overflow-y property to add a vertical scrollbar to the scrollbar container. It's essential to set a height for the scrollbar container to ensure that the scrollbar appears.
With these simple steps, you can now create a table with a scrollbar using HTML and CSS. Experiment with different properties and styles to customize the scrollbar and the table to suit your requirements.
Adding a scrollbar to a table using HTML and CSS is an excellent way to present data in an organized and user-friendly way. With the code snippet provided in this blog post, you can easily create a table with a scrollbar and customize it to fit your specific needs. A scrollbar makes it easy for users to navigate through large tables, ensuring that your website remains easy to use and visually appealing.

Video Tutorial at: https://youtu.be/xjIzHsO5wtw
"Fav" is the abbreviation for "favorite". A favicon, otherwise known as a shortcut icon, website icon, tab icon, URL icon, or bookmark icon, is a file containing one or more small icons that are associated with a particular website or web page. Or favicon is a small image or a logo of a website that shows before the title of a page on the browser's tab. It can also be shown when users bookmark your website or save it to their favorites.
You can design your logo and make it transparent where necessary. In my case, I used MS paint to design a simple logo and used Adobe Photoshop to remove background arround the logo and then saved as png file. After that, I google searched "image to favicon converter". Then picked an approprite website to convert image to favicon.
The following code demonstrates how the favicon can be linked. The favicon is added using a <link> tag as shown here in this line: <link rel="icon" type="image/x-icon" href="./images/favicon.ico">
The 'rel="icon"' attribute indicates that the linked resource serves as an icon. The link type is "image" or "x-icon" and this (href="./images/favicon.ico") serves as the path to the favicon file in the root directory.
This is how you can link favicon in html.

Video Tutorial at: https://youtu.be/UpOKBVuweMg
We know that HTML has many tags within the <html> tag and the <address> tag is one of them. Each tag carries a different usage and purpose which provides the overall structure, presentation, and functionality of a web page such as text formatting, styling, linking, etc.
Have you ever used an <address> tag? This tag is used to share contact information in an HTML document or on a website.
Definition of an <address> tagSo how do we define an <address> tag?
An <address> tag in HTML is used to define the contact information of an author/owner of a document/article/website. An address element can be a physical address, phone number, link, social media ID, etc. which can be used as contact information. The text inside the <address> element will be rendered in italics. There will be a line break which is equivalent to one <br> tag before and after the <address> element.
Where to use <address> tagThe <address> tag is straightforward and easy to learn. The only thing you need to remember is that whenever you show an address on your web document, make sure your contact information is written within the <address> tag. This will help you improve the structure of your website and may contribute toward a better SEO ranking.
You can keep your contact information or the information about an author or anyone in any part of your web document. It can be at the footer, inside/above/below an article, on a separate page, etc.
Example of an <address> tag:
<address>
Edited by: John Bennet
From: Washington, D.C.
</address>
The CSS of an <address> tag can be written as shown in the <style> tag below:
The <address> tag can also support the Global Attributes & Event Attributes in HTML.
SummaryAn <address> tag is a simple tag just like any other tags used in HTML and it is used to provide contact information or information of an author/owner for a particular web(HTML) document or documents. It can be used in any part of the HTML. So remember to use the <address> tag whenever you share contact information. I do hope my readers will love this simple blog post. Goodbye for now. Until next time!

Video Tutoral at https://youtu.be/B1UCE3nfLww
The <hr> tag defines a horizontal rule or thematic break in an HTML page. It shows as a horizontal line. It is used to divide or separate content or a change of topic, chapter, section, etc. It doesn't require an end tag.
The <br> tag is an empty tag used to break a line in HTML text. Like the <hr> tag, the <br> tag has no end tag. According to my online research, I learned that it is generally used in poems and addresses. Despite poems and addresses, I found that the <br> tag is also used in other topics.
The <hr> and <br> tags can be also written as <hr/> and <br/> respectively.

1. DTD in HTML 4.01:
2. DTD in HTML 5:

Video Tutorial at: https://youtu.be/tUzscpat6Hw
In this post, you will learn how to use a half of <br> tag or reduce the height of a <br> tag, or adjust the height of a line break in HTML. It's so easy and straightforward.
The following code demonstrates how the line-break or <br> tag's height can be adjusted.
You can also use line-height property to adjust the line break's height. But the code above uses margin-bottom property to adjust the height of a line break.
To create line breaks, we have to use <br> tags. I can add <br> tags to create more line breaks but if I wanted to reduce the height of the gap created below a text line, it is a way bigger problem for us. So here in this post, I disclose my little tips and tricks to reduce the height of a line break in HTML.
You can remove <br> tags. Give an id name to an element and start styling it. You can use something like margin-bottom property to adjust the space below a text line. Use margin-top property if you are adjusting the space above a text line. Also make sure to use display: block; When we use display: block;, it automatically creates a line break equivalent to one <br> tag for each text line.
This is how you can adjust the height of a line break in html.
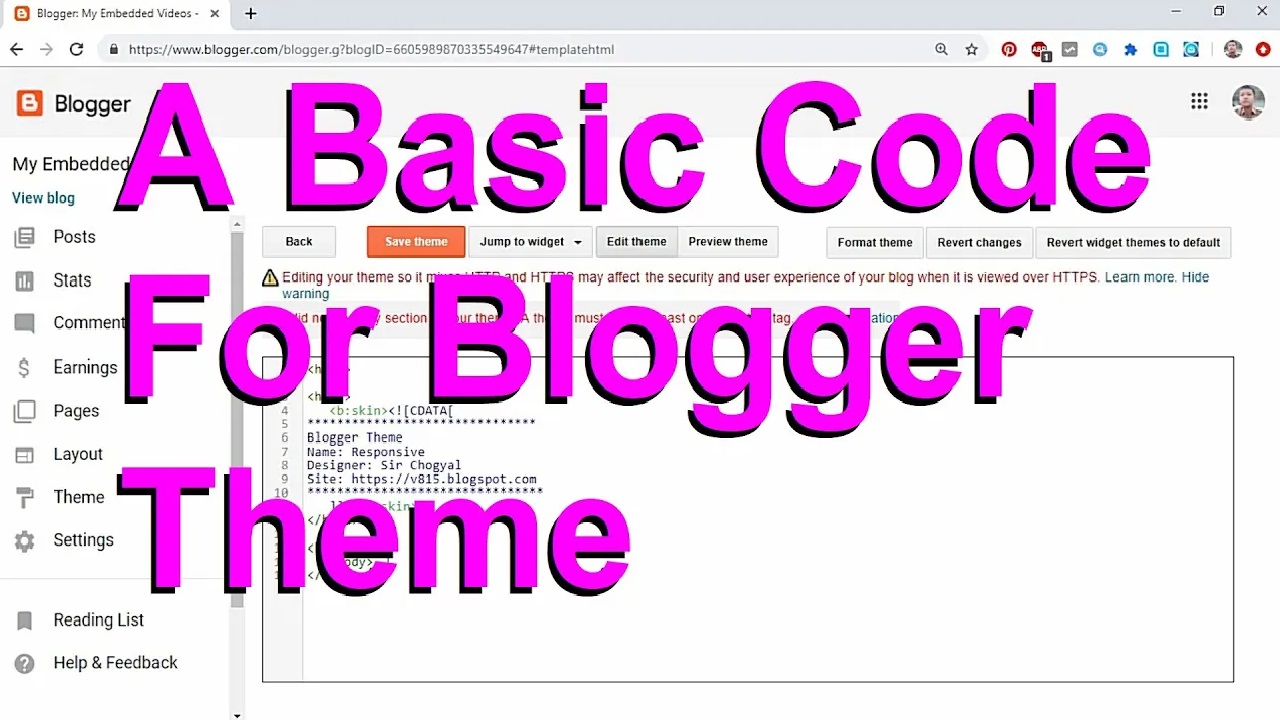
We know that Blogger is a very free plateform but it is not as easy as you may think. You must understand how it works from the ground lavel. The theme provided by the Blogger itself is so good but if you want to advance it further, you must have the knowledge of HTML tags, CSS, JavaScript, etc. However, if you don't like to learn coding, you can simply buy a Blogger theme online or hire a web developer.
Video Tutoral at https://youtu.be/MH90m2o1ulM
You may start coding the Blogger's theme by using the basic code given below. Copy the code to your blogger's theme and save the theme. Make sure you backup your old theme before making any changes with the code I have provided here in this blog post.
If you use the code given above, the whole blog can be be controlled by you. However, posting from pages and posts will not work. You have to create everything from scratch or else you can add the code given below to the above code to get more blogger options. But you must follow these steps otherwise it may get error. 1. Copy the above code to your blogger theme and save it. 2. Just below the header section, paste the code given below. 3. Save your theme.
It can be appeared as shown below.


